Technical Tip
2.8 Feature
If T accounts are enabled in your system, you can now print a balance sheet by T account.
|
|
|
Technical Tip 2.8 Feature If T accounts are enabled in your system, you can now print a balance sheet by T account. |
To display or print the Balance Sheet Report:
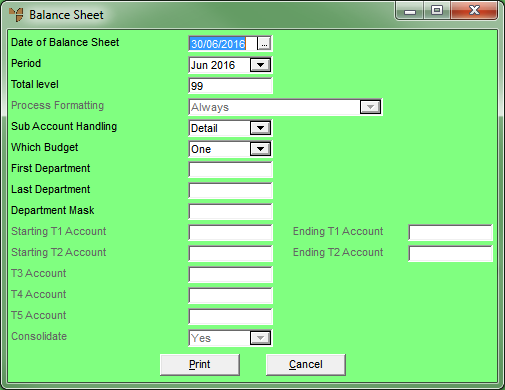
Micronet displays the Balance Sheet screen.

|
|
Field |
Value |
|
|
Date of Balance Sheet |
Enter or select the date to appear on the Balance Sheet. |
|
|
Period |
Select the period to produce the Balance Sheet for. |
|
|
Total Level |
Enter the total level handling for the Balance Sheet. |
|
|
|
Reference For more information on the Total Level field, see the same field on the Account File Update screen (refer to "File - GL Accounts - GL Account"). |
|
Process Formatting |
|
|
|
|
Sub Account Handling |
Enter the type of sub-account handling for the Balance Sheet. Valid options are:
|
|
|
Which Budget |
Choose the budget for the actual Balance Sheet amounts to be reported against. |
|
First Department |
Choose the first department to be included in the Balance Sheet. |
|
|
Last Department |
Choose the last department to be included in the Balance Sheet. |
|
|
Department Mask |
|
|
|
Starting T1, T2 Account |
If T accounts are enabled in your system, select the first T1 and/or T2 account to be included in the Balance Sheet Report. |
|
|
Ending T1, T2 Account |
If T accounts are enabled in your system, select the last T1 and/or T2 account to be included in the Balance Sheet Report. |
|
|
T3, T4, T5 Account |
|
|
|
Consolidate |
|
Micronet displays the Select Output Device screen.
|
|
|
Reference For more details on these options, refer to "Selecting the Output for Inquiries and Reports". |
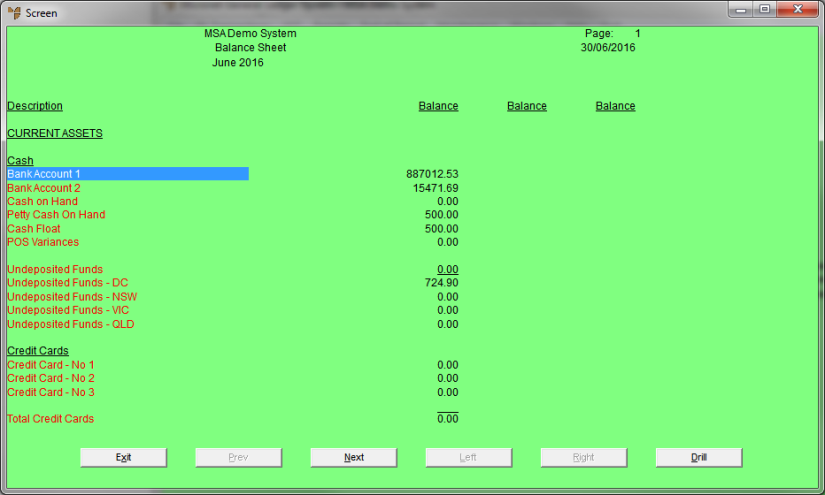
Micronet prints or displays the Balance Sheet Report.
